
How to Replace the Starter Cord on a Snow Blower
There are many things that can stop you in your tracks when clearing the snow after a storm. The most frustrating would be a broken starter cord.
If the cord shows signs of tearing or fraying, you should replace it before it breaks. Nothing’s worse than being stuck in the snow with a snow blower that won’t start.
Replacing the Starter Cord
1) Remove the Start Cord Assembly
Remove the starter cord assembly by taking out the bolts holding it in place.

Remove the Starter Cord Assembly
2) Remove the Cord
Cut or untie the knots at both ends of the cord. The recoil pulley will unwind.

Remove the Cord
3) Attach Replacement Cord to Starter Handle
Thread one end of the replacement cord through the starter handle and tie a knot.

Attach Cord to Starter Handle
4) Attach Replace Cord to Recoil Pulley
Thread the other end of the cord through the hole in the recoil housing. Then tie a knot through the recoil pulley hole.

Attach Cord to Recoil Pulley
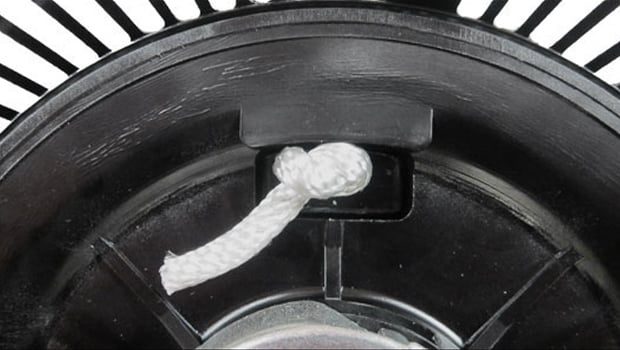
5) Wind the Recoil Pulley
Hook the cord to the slot on the recoil pulley. While keeping the cord inserted in the slot, use the cord to wind the pulley. This will create the tension needed for it to recoil.

Replacing the Starter Cord
Let the Cord Slowly Rewind
Once the pulley is wound, unhook the cord from the slot and slowly let the cord rewind around the pulley. Test the recoil by pulling the cord and making sure it recoils smoothly.

Let the Cord Slowly Rewind
After reinstalling the starter cord assembly onto your snow blower, try to start it. If you’re snow blower revs up, you’ve done a great job.
Jack’s Safety Tips: Before servicing or repairing any power equipment, disconnect the spark plug and battery cables. Remember to wear appropriate safety glasses and gloves to protect against harmful chemicals and debris. View our Disclaimer.
Featured Parts and Products:
About the Author
Turner Anderson is the Internet Marketing Manager at Jack's and the editor of Jack's DIY Center. You'll also find him creating How-To articles, videos, newsletters, and much more.
Related Posts

How to Adjust the Skid Shoes and Auger Control on Your Cub Cadet Two Stage Snow Thrower →
How to Test and Adjust the Drive Control on Your Cub Cadet Two Stage Snow Thrower →
How to Assemble the Handle and Chute on Your Cub Cadet Two Stage Snow Thrower →
How to Replace the Auger Belt on Your Cub Cadet Two Stage Snow Thrower →

7 Responses to How to Replace the Starter Cord on a Snow Blower